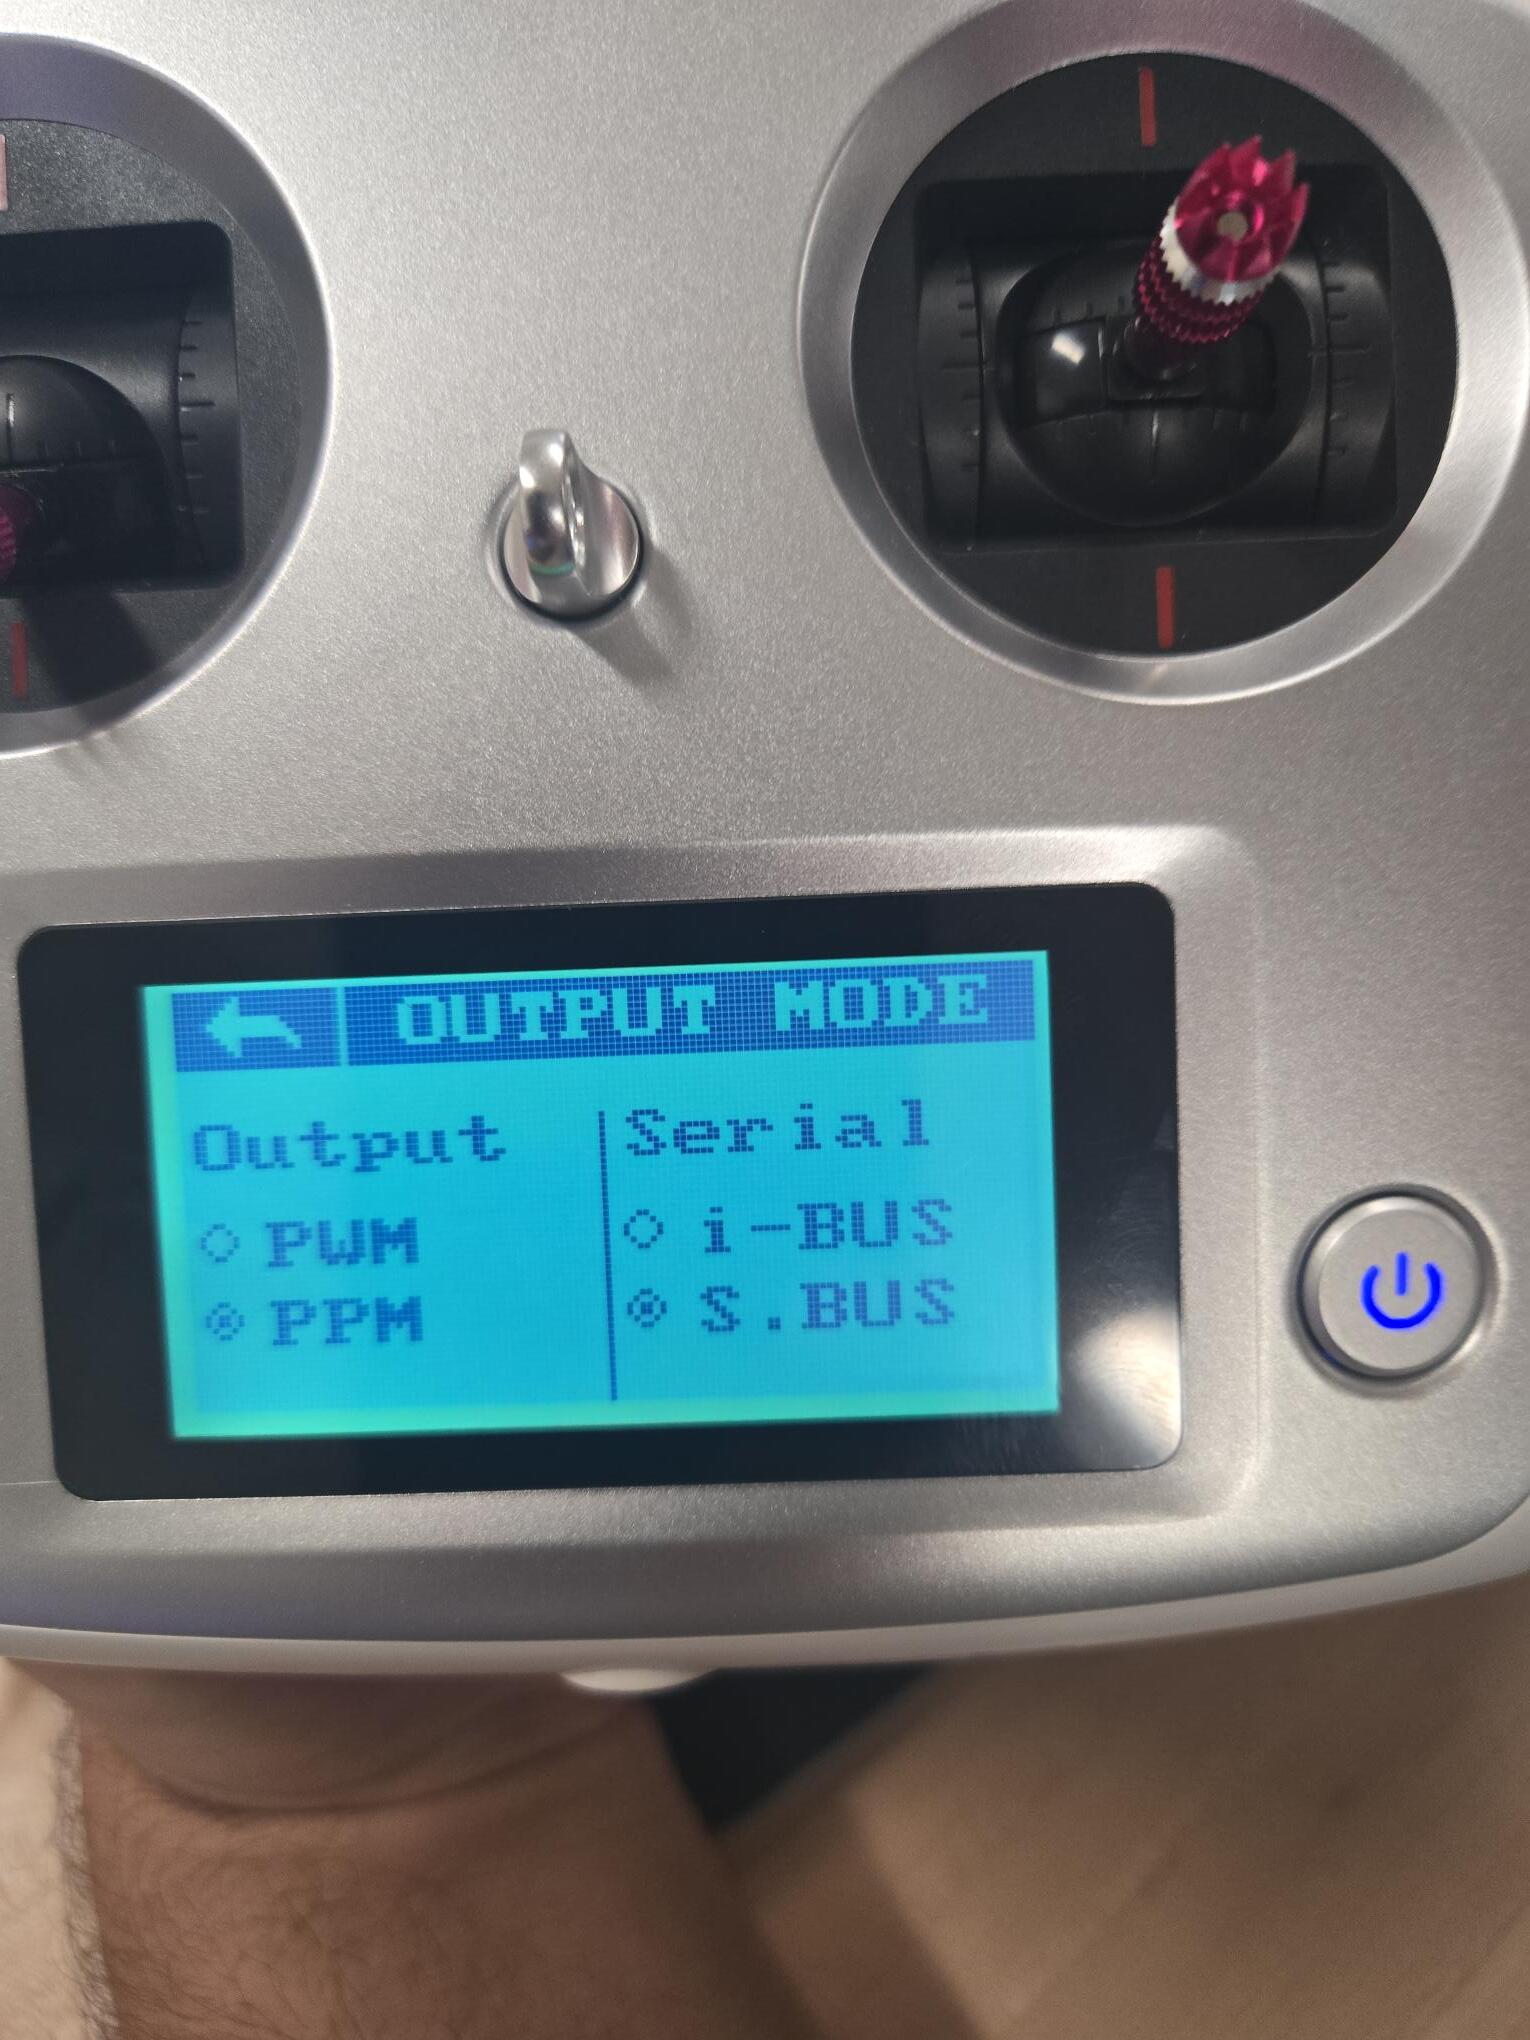
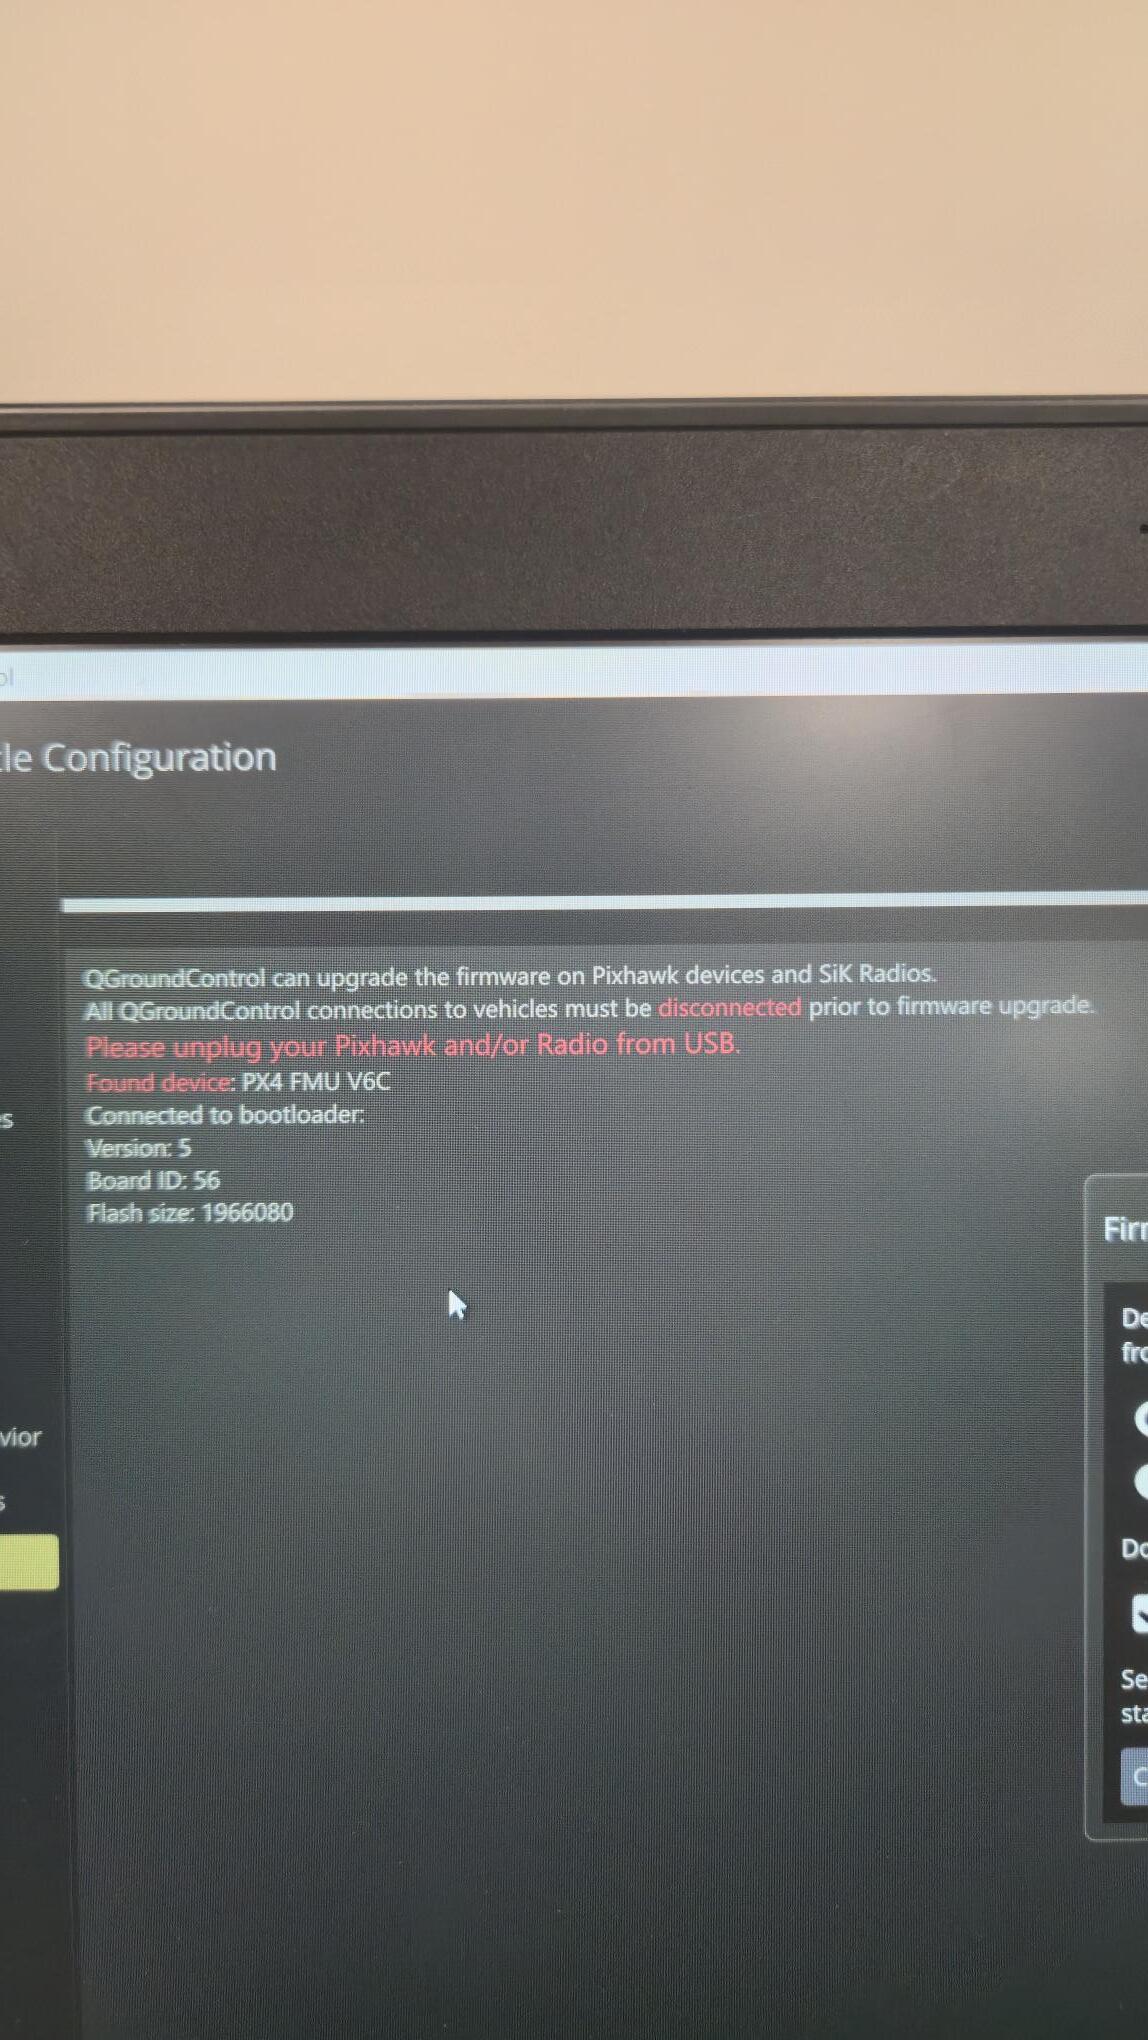
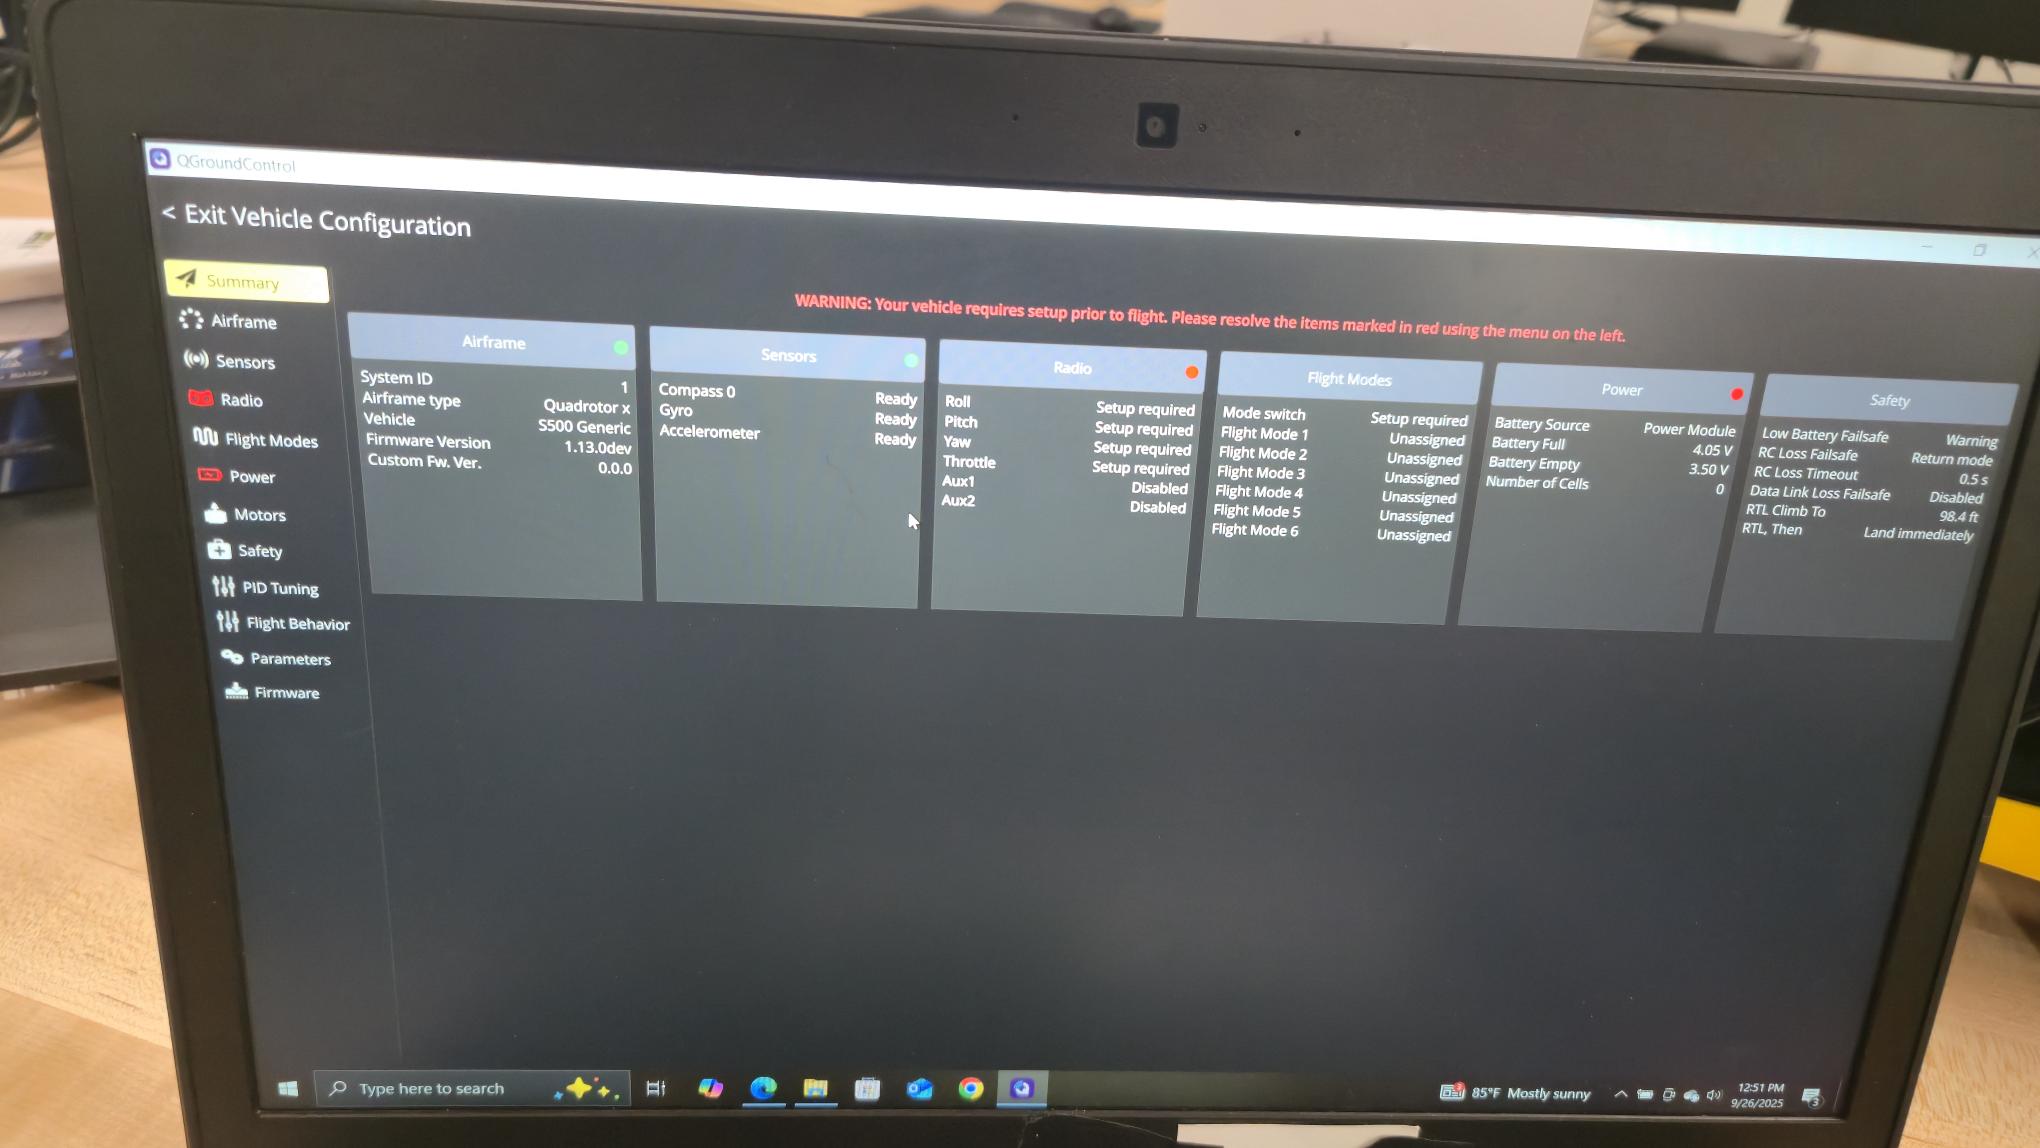
My students are having trouble connecting the transmitter to the receiver,. They have followed the steps in the guide for binding (so I believe), but when they try to configure the radio in QGroundControl, they receive an error message stating Radio Not Ready. Please turn on transmitter. The transmitter and receiver are on and bound. There is a solid light on the receiver, and I am unable to turn off the remote until I power off the receiver.
Attached are some pictures of the remote, receiver and QGroundControl.
Can you go to the summary screen and share what PX4 version you’re running? Sorry for all the questions. Just trying to get my head around this as I’m at a bit of a loss right now!
I took a Pix Hawk 6C from another drone and attached it. I ran the update of the firmware and it seems to work, so it appears that it is an issue with the Pix Hawk. It recognizes the controls from the transmitter when we connect. We are going to recalibrate everything and continue on and see if we have any further issues.
I also set the PixHawk back to a standard configuration and then reinstalled the px4_fum-v6c_default.v1.13.0.f7c457e.px4 firmware, but it still gave us the same error.
If you want to continue working on this issue, we would be happy to try anything that you suggest. If not, is there a way to get a replacement so I can return the Pix Hawk to the other drone?
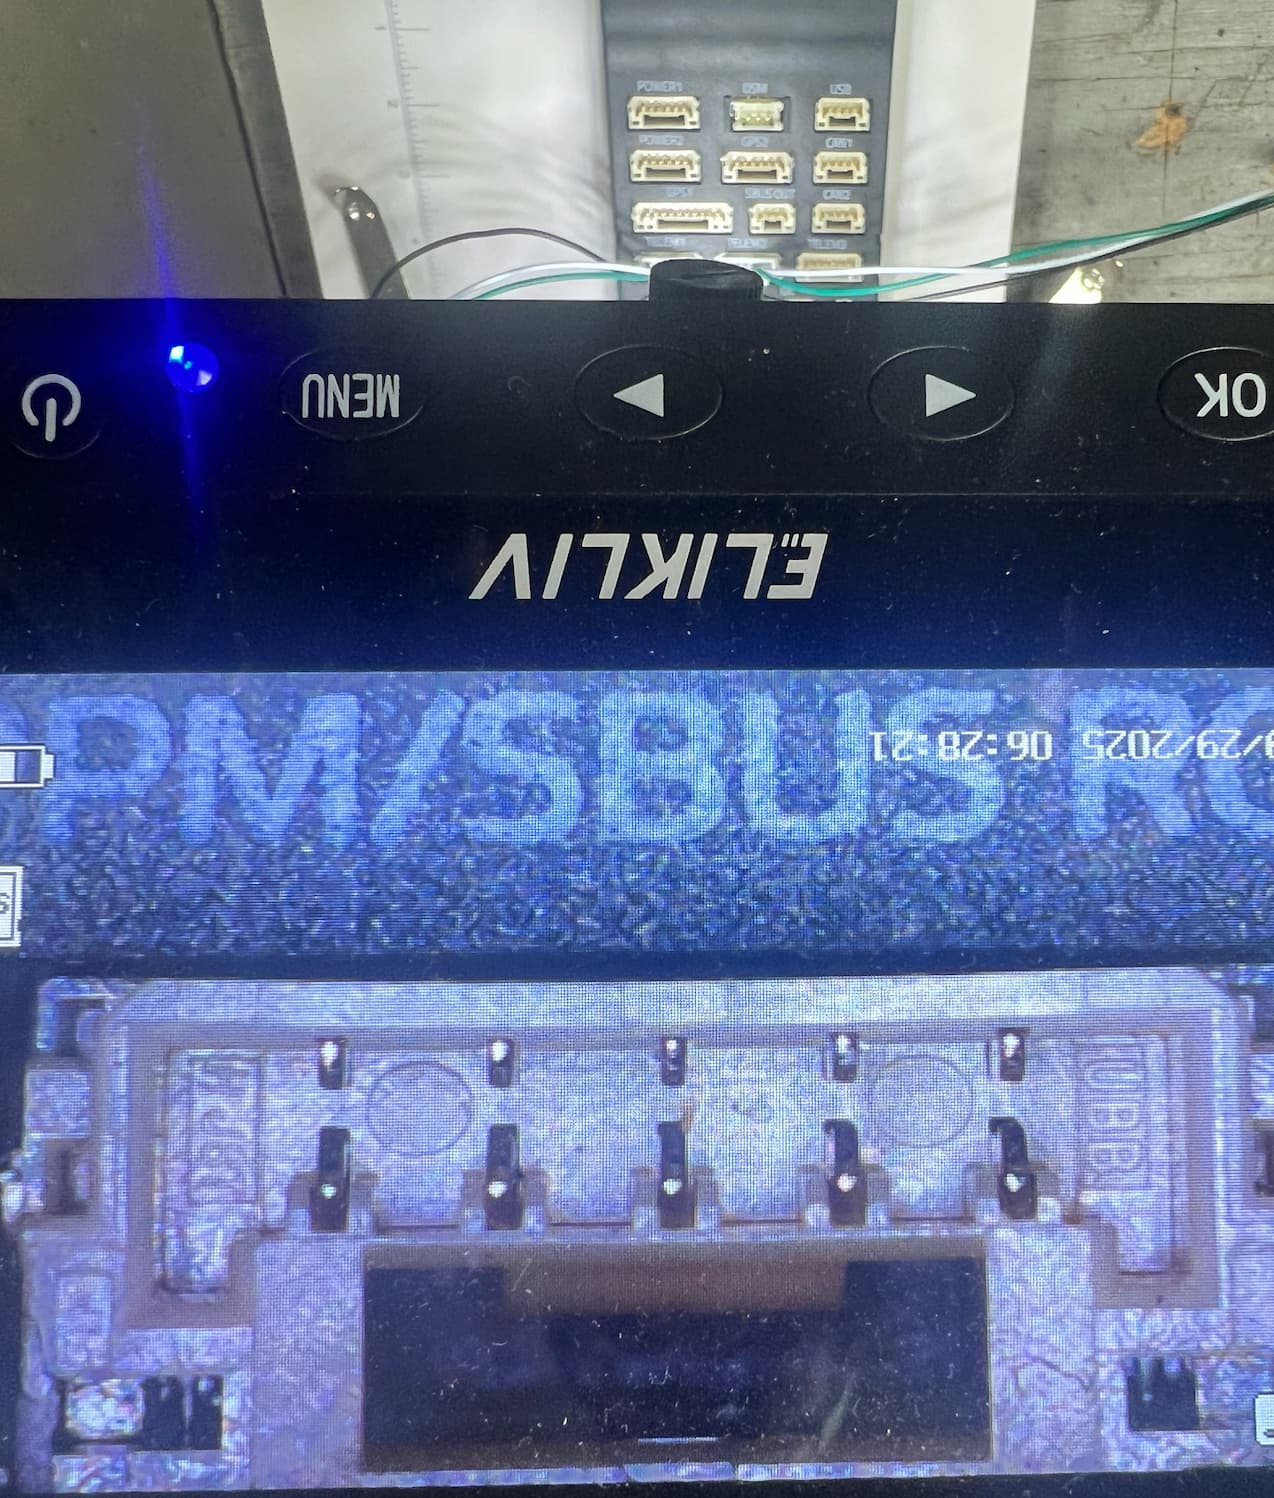
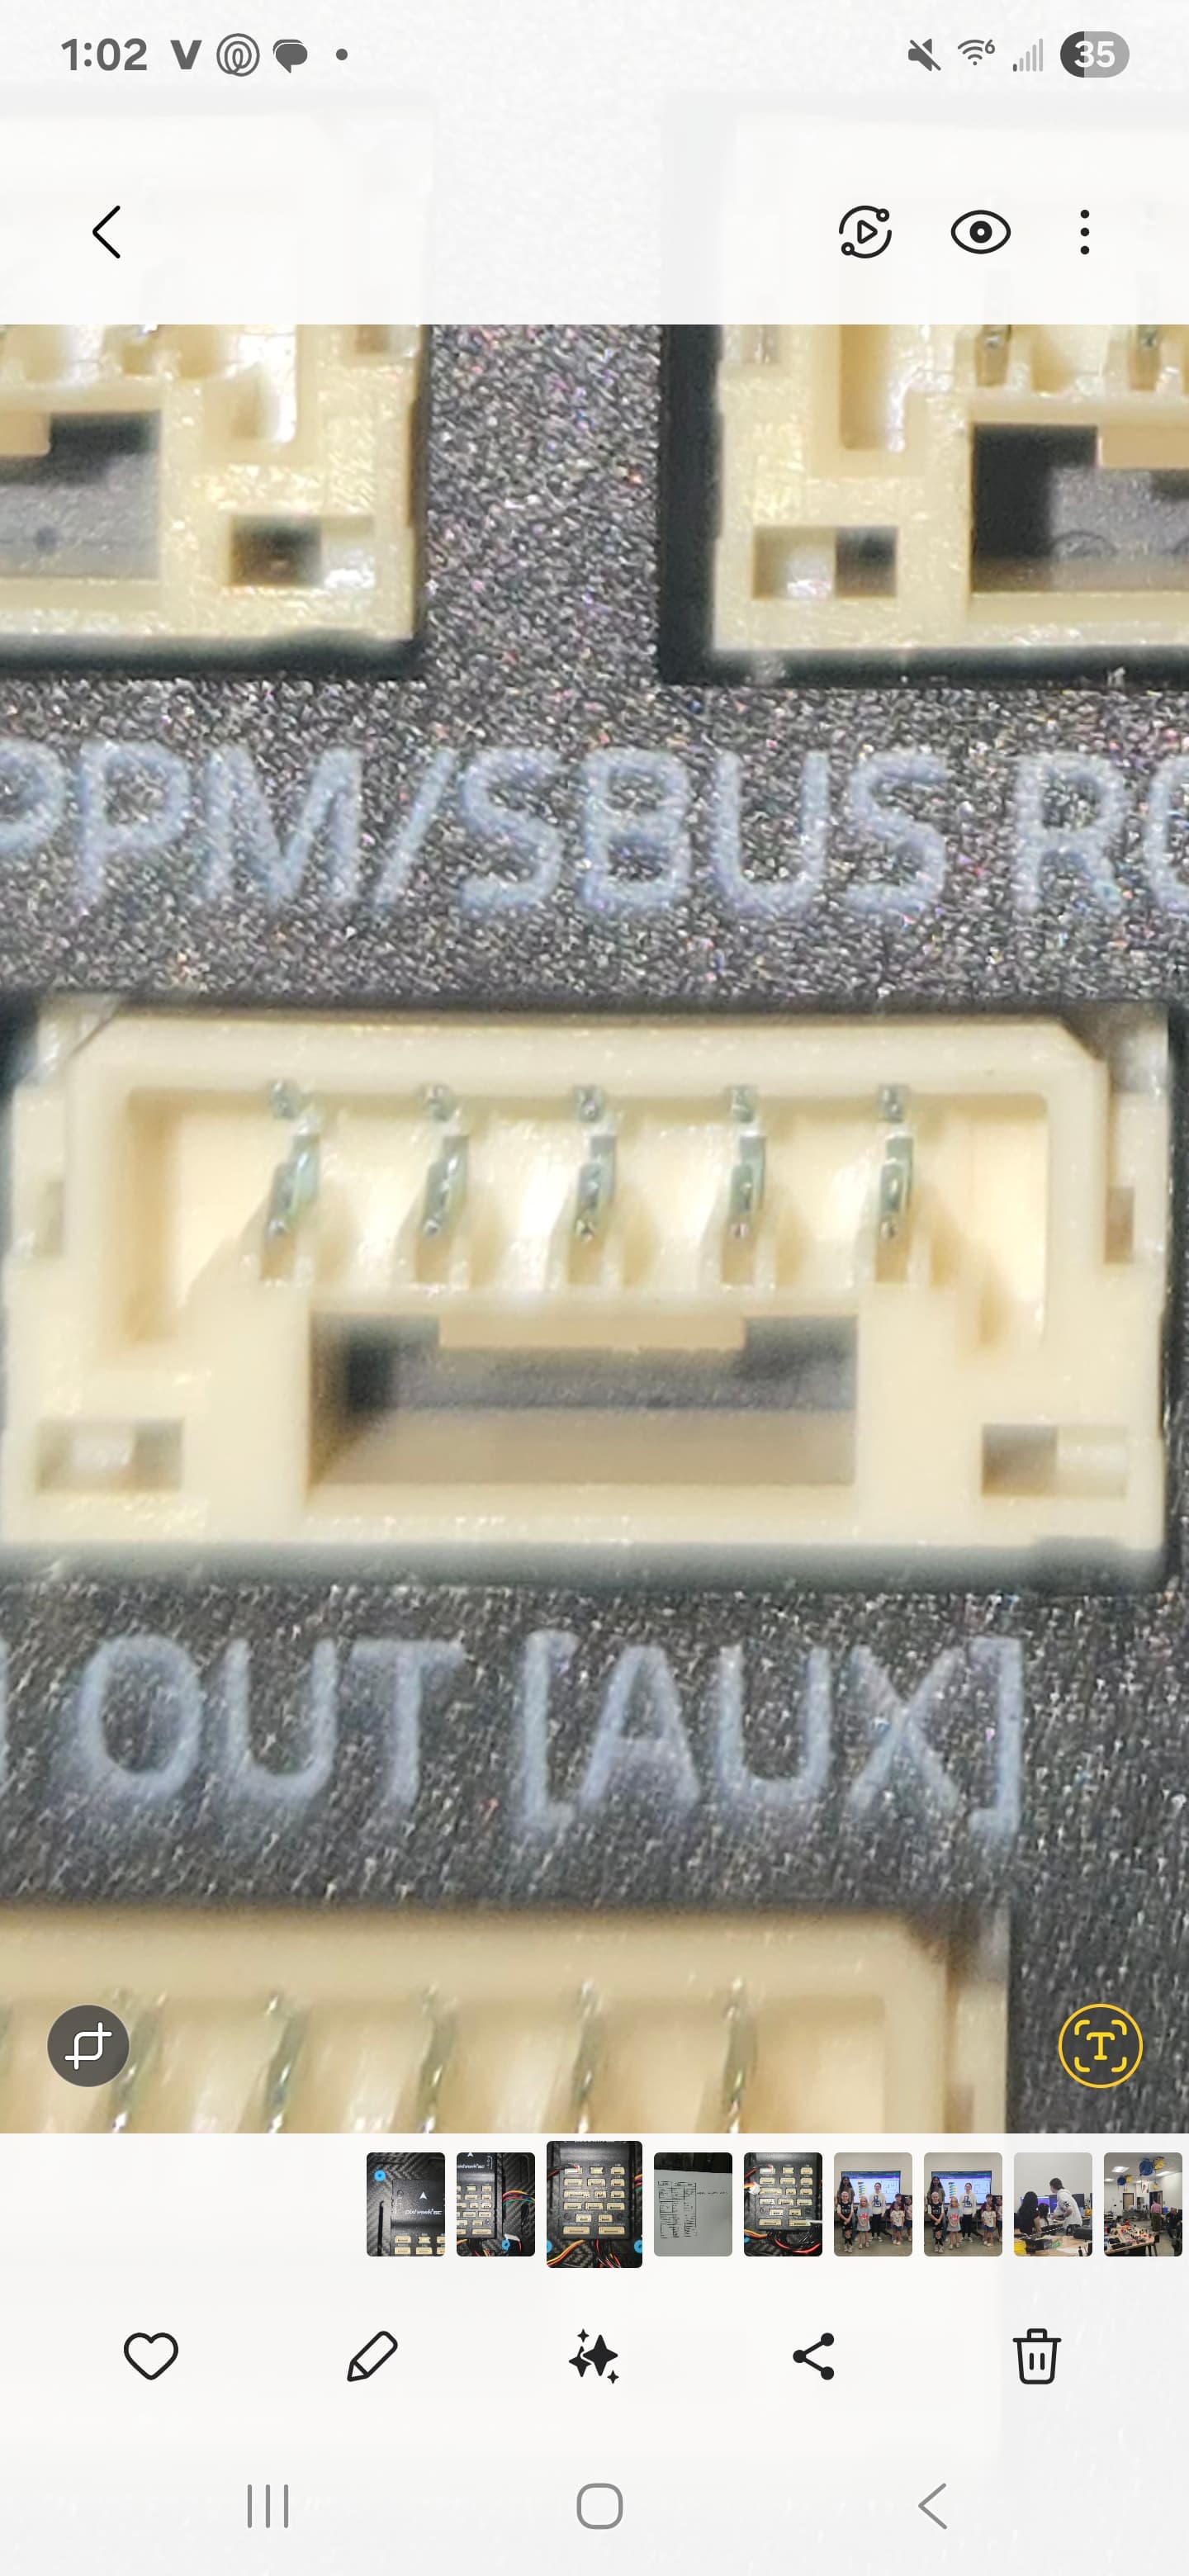
Thanks for the info and glad you got it sorted. Any chance you can take a look at the physical pins of that port on your bad Pixhawk 6C? Sometimes a pin accidentally get bent. It’s a lot less common with the JST-GH connectors (on the 6C) but worth a look. Here’s one of mine that look good:
We are having the same problem as this team is having. We do not have another Pixhawk 6 to try. We checked Tx setting on the transmitter and the pins for the JST connector ana All are good. What should we do to solve this problem.
Will you please update to PX4 1.16 and give a the transmitter a try. When you do the firmware update it will prompt you to install the stable release (which is PX4 1.16) as today (10/2/2025). Details on the firmware update process in case you need it:
The drone was flying and everything was working. The students then upgraded the firmware to 1.16 today as they were following the Advanced Drone Assembly. Now they are unable to power the motors. They were using V1.13
They are able to arm and disarm and all of the radio sliders show a response when moved, but there is no response from the motors. The Actuator testing does not work either. I am attaching screenshots of what I think may be important. Please let me know if anything else would be helpful.
Hey guys, this is a common issue I’ve seen across a lot of AVR drones, and many teams are running into it. Luckily, it’s a simple fix. Here’s a quick checklist you can go through to get your actuators working again:
First, double-check in your Summary tab that you’re running PX4 v1.16. From your screenshots it looks like you are, but confirm that just in case.
On your AVR drone, take a look at the PWM cable on the bottom of the Pixhawk. By default it’s usually plugged into the right port. Go ahead and move that cable from the right port to the left port (it should be labeled something like PWM OUT or PWM MAIN). The left port is right below where your telemetry cable is connected.
After that, open QGroundControl, go to the Actuators tab. You don’t need to do an ESC calibration anymore, since we’re using a different setup now.
In the actuators tab, switch from PWM MAIN to PWM AUX, and select DSHOT600.
Apply those changes, reboot your vehicle, and then re-assign your motors in the actuator tab.
Once that’s done, your actuators should respond properly instead of staying unresponsive.